Thursday, March 22, 2012

Vacation Bows


I decided to make my daughters some hair bows for our mini-vacation coming up, and since I like to show off share, I thought I'd post a very brief how-to. Ok, it's mostly just tips.  I have had years of experience in various areas of boutique bow making, most recently the bottle cap part. If you want any more tips about bottle caps, images, sealing, gluing, resins and all the other details--visit my other site: 


Also, I will not be posting any tutorials on how to physically make the bows--there are already a bazillion web sites out there that do that very well. This short 'how-to' is for those who already know how to make the bows, or are going to learn elsewhere.


Materials I used : Xyron Sticker maker (so much easier than glue), epoxy bubbles/discs (so much easier than resin), ribbon (make your own bows!), and smooshed bottle caps, and images. You'll also need glue to adhere the bottle caps to the bows.


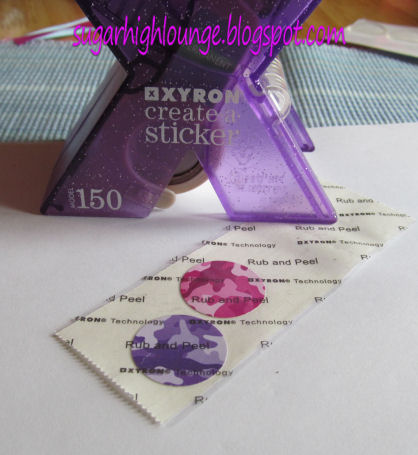
The Xyron sticker maker is so much easier and less messy than fighting with glues. I do recommend the PERMANENT adhesive rolls for this type of project. Run the images through the machine, rub and apply to the bottle caps.

The pre-made epoxy bubbles (some people call them discs) are also easier and less messy than using the various forms of liquid resins. For this specific bow center, they work best--I am not adding anything else to the caps. I apply them adhesive side down, press firmly ..and my bow centers are done. 

Make your bows. There are a ton of tutorials out there for this, I suggest the videos if you're a beginner. Be sure to seal the ribbon ends by melting the edges!!! Fraying ribbons will ruin a good bow. 

Frayed on the left, sealed on the right. It only takes a second to seal them!


Assemble...glue the bottle cap to the center (I used a hot glue gun, it's my preference at the moment ha ha). They are ready for my girls to show off at the beach!


Tuesday, March 20, 2012

Homemade Glitter - Pinterest Find....and fail.


I adore glitter. I believe there is not enough sparkle in the world. If I were President...or (preferably) Queen of All Things--I would decree everything that isn't already sparkly to be covered with glitter. So, when I saw a Pinterest photo that claimed you can make homemade glitter out of salt...I was all over that!

To be honest, it does sound too good to be true. If we could make our own glitter so easy..why would it cost so much? But then again, lots of things are overpriced. So, I gave it a try. I took my salt, mixed in the liquid food coloring and baked it in the oven. I let it cool. I looked at it. I now have blue salt. It's pretty, but it's not glitter. I have now found several other people (via there blogs) who have tried this with the same results. DANG IT!! Oh wait -- My kids might think this is awesome, though...I could use this stuff instead of colored sand for those cute little sand sculptures in glass jars.

Final Results: When you mix food coloring and salt, then put it in the oven ---you get hot colored salt.

Monday, March 19, 2012

Handmade Watercolor Paints


Here's another find that is far from new. Handmade watercolor paints, made from random things you might have around your house. I found the tutorial and recipe at Lilac Silhouette, which I used. 


The results were great. I followed the directions, using generic products (not name brand). Everything was cheap, this project cost maybe $1.  


The next day, I checked them...and they looked like this. Eek! 
So, I drained off the extra..oil?  And let them dry some more. 


Success!!! Then I tested them...

Yay! They work. It would appear the more food coloring you add, the better the color (obviously). The yellow I made (from the 'drain' photo), didn't show up at all. Next time I will add half the bottle of food coloring!! 

Moral of the story - make your own watercolor paints, especially if they are for kids!


Original idea/tutorial found at:

Sunday, March 18, 2012

Pinterest Find - Enamel Painted Bobby Pins


This idea may have been around for years, but I just found it the other day. What can I say? I'm a little behind the times! The link is HERE, but I doubt anyone really needs the tutorial that's there. 


Anyhoo...painting bobby pins with nail polish is brilliant and overly crazy super insane simple. I added glitter, rhinestones and even used some China Glaze Holographic nail polish (even though you can't see it in the photo). They all turned out great, and my daughters are in love! 


A couple helpful tips, if I may -


~Use card stock covered in plastic (I used a giant Ziploc back), this will keep the paint (and pins) from sticking! 
~I also sprayed them white before using the lighter colors of nail polish, so the neon's would 'pop' more. 
~Two coats of nail polish, and one coat of clear polish (or clear enamel spray, which is faster) to seal. 
~The rhinestones are from those cell phone decoration sheets, the blue ones were pre-glued in the lines!! 


Try it, you know you wanna!

Saturday, March 17, 2012

Found - Kids Art Made Into Toys!

I found something...something so awesome, I have to share it....

Child's Own Studio is a must visit for any parent, or child at heart. What they do is magical...they take a drawing (made by a child, for the most part)...and turn it into a stuffed doll/animal.


Sadly, it would appear the creators at Child's Own Studio are quite backed up, and are not taking any new orders at this time. It's no wonder, though!! This idea is BRILLIANT!!!


Here's a sample-

dinosaur with hearts and blue polka dots 

Blue dinosaur


"Child’s Own Studio celebrates children’s art and their imagination with every handcrafted one-of-a-kind soft toy."  -Child's Own Studio
P.S. There seems to be a few links to other companies which do this as well, noted under "Other Talented Softie-Makers". 


~

Friday, March 16, 2012

Homemade Alcohol Inks


Alcohol Inks are highly expensive...considering what they are. So, making our own alcohol inks can potentially be insanely helpful. I decided to try these out, and see if the homemade version compares to the purchased versions, such as Ranger Inks. 


Here's what you'll need:
Empty Spray Bottle(s)
Rubbing Alcohol 
Powdered Drink Mix (unsweetened)

I have no link to an original tutorial on this one, since it's so simple. All you do is mix alcohol with unsweetened drink mix. Put it into a spray bottle, and you're done. The hardest part was finding the spray bottles. Empty bottle can be purchased at stores like Walmart, in the travel size section (where you buy the tiny soaps and shampoos). Or, you can use some old tiny body mist bottles like I did. 

Most tutorials that I found said to add the powdered drink mix to the bottle, poor the alcohol in, and shake. Since my bottle were so small, I chose to pre-mix the ingredients in a foam cup first. This also helped keep those little undissolved bits out of my bottles, which I will discuss shortly.

I tried 3 different brands ...here are the results --


Cherry, Wylers. I used two packs, and a 1/2 alcohol. The spray dries into a reddish/pink color. However, the drink mix does not dissolve well...and several tiny spots of the mix itself also come out of the spray nozzle. It adds an interesting effect, if that's what you're after. 

Purple, Flavor-Aid. I used two packs. This color worked great on paper (although you can't really see it). This brand of mix dissolved the worst...leaving a lot of undissolved bits at the bottom of the foam cup (see photo below). 

Lots of undissolved drink mix in the Flavor-Aid version. 


Blue, Kool-Aid. This may be the best, as the best...I only used one pack of mix to get this pretty color. It did have some undissolved bits, but that seems to be something we have to live with. 


Here are all the colors/brands, sprayed multiple times (and shown a bit wet). 


Overall, I would say this method of making our own alcohol inks works fairly well. Kool-Aid did have the biggest color 'impact' for the buck. Flavor-Aid and Wylers are a close second.

The biggest tip I can offer is to do as I did, and dissolve the powders as much as possible before adding them to a spray bottle. Those little bits can clog the spray nozzle, or even come out onto your project. Be aware, however...alcohol dries fairly quickly and you do not want to leave it sitting in a cup for too long--it will evaporate. 

Depending on which application you are using these inks for, some may not work out as well (such as stamping). For adding a hint of distressed color to paper--this will work. 


Tuesday, March 13, 2012

DIY Glitter Flats (or heel...or whatever)

 If you pay attention to fashion (or if you watch commercials on TV), you may have noticed the growing trend in sparkly glittered shoes. The shoes, mostly heels and dress flats, are adorable and ...expensive. I found a pair of Jimmy Choo Walsh Glitter Ballerina Flats on the Neiman Marcus website for $425!! Don't believe me--click here! Ok, yes this example is on the extreme side, there are generic knock-off's available at Target and Sears (among others) ranging from $15 - $60. I'm a thrifty kinda gal...so I say BAH!! HUMBUG! If I can make it cheaper, and (even better) more the way I want it...then that's how it's gonna be!


 Last Halloween, my daughter was a witch...I bedazzled a black dress and made her some glittery black flats to match. The same glittery flats that are now "in style". I do not have  after photos, sadly, but I do have a before photo.


 Aren't those...special. I got them at a thrift store for 50 cents...what did you expect? So, I glittered them, and they looked great. The shoes are no longer with us, but they looked very similar to the ones shown in the photo below.


 This photo is from a DIY Tutorial from Vanilla Joy -found here.  Same theory, although I have some personal recommendations to add. 


 Firstly, I took a pair of ugly gold flats with a plastic decoration...It was sewn on, and easy to snip off and remove. Instead of painting them black with spray paint (which would chip and fade on the slick material over time), I used a Sharpie and hand-colored them. 


 I also used Martha Stewart glitter, which I adore...but that's a post for another time. I used the colors "Onyx", and "Hematite" for extra sparkle. There's a kit that would come in handy if using the same colors from Martha - (black is at the far right, and hematite is in the center).


 Once everything is all sparkly and shiny...and dry - seal it! This can be a tricky part, as many spray sealants will dilute the glitter's shine, and cause the glitter to look matte. I did not seal the shoes I made, and the glitter only lasted through 2 -3 uses. I may suggest Krylon's Clear Glaze (spray), however I am unsure of the results. 


That's all for now....I'll be adding many more crafty things soon!


Sunday, March 11, 2012

St. Patty's Day & Update

I know I've been slackin' again. Without my eBay business, I've had some free time...which I filled with my college classes, yay me! 

So, here's a little something to hold you over until the next update (coming soon)--

Shamrock Pretzels


The original project comes from Family Fun, found here: Clever Clovers
The version found above, is from Home Seasons right here: Shamrock Pretzels