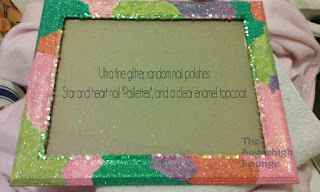
The before.
The frame...a sad dark brown wood-like thing with a gold paint 'beads' around the inside.
I used the following for this frame:
- Acrylic paint
-Various colors of Martha Stewart Ultra Fine Glitter.
-Random nail polish colors to match the glitter colors, and a clear polish.
-"Paillette" nail decor (tiny plastic hearts and stars for fingernail decoration)
-Any clear enamel for topcoat (a sealer works best).
The directions are simple.
Prep: You will need a flat surface, something to lay under the frame to catch the excess glitter (I used foam plates to 'catch' the glitter and return it to the tubes to use later). Remove the glass and the cardboard backing from the frame.
1. Paint entire frame with a base coat of any color of Acrylic paint, (I used a light pink, color doesn't matter too much but a light color will let the glitter shine as a lighter color, and dark base coats will make the glitter seem darker in color).
2. Apply another base coat and let this dry overnight (12 hours).
3. Allow to dry overnight, or at least 12 hours.
4. Paint nail polish in sections, one color at a time. Any design or just 'blobs' like I did. Immediately sprinkle heavily with glitter. Let sit for about a minute and shake off excess glitter.
5. Repeat this process for every color you choose to use.
6. Using a clear nail polish around the inner edges of the frame, add the paillettes in matching colors.
7. Do any touch ups that are needed. Adding more nail polish and glitter as needed.
8. Nail polish dries in about 15 minutes, so allow it to dry completely.
9. Spray entire frame with the clear enamel sealer (take it outside, of course), then allow this to cure for 24 hours.
10. Replace glass, and cardboard backing....and you're done!


